


UPDATE: I’ve included some analogies in the “Doing Stuff With Our Class Object” section to hopefully make what is being done a little more clear.
We recently came across an issue in our environment with an application that has permissions manually defined on the server rather than through security group. Normally, we’d just brush it off and allow the team managing the application to continue to do things the hard way, but this time we had a direct need to know who had access and who didn’t. Honestly, it’s probably more an issue with how the application is configured than the team managing it, but I digress.
This particular application has an Outlook add-in that is not quiet when it cannot connect to the server, and since it’s a base image application we need to be able to disable the add-in for users who don’t have access to the application. Previously we did it using a process we called “Outlook First Run” - it was run during the provisioning of a user account on a laptop to setup a number of different things (signature, DMS integration, etc). The process worked, but relied on seeing the “error” dialog pop up and then disabling the add-on for the next run. For some reason, this proved to be an issue in our Remote Desktop environment.
Enter PowerShell. Microsoft’s best gift to SysAdmins since VBScript.

Since there was a web portal for this application with a predictable result based on the user access, I decided to get the HTML from the page and then look for my predictable results. Before PowerShell 3.0, the best (err… only?) method to get this stream was through .NET classes. Hold up… Classes for an HTML request? We’ve got PowerShell 3.0! What ever happened to using good old cmdlets?!

Classes?! We don’t need no stinkin’ classes!
Here’s something I want you to consider about PowerShell. For a good deal of Cmdlets, they’re really just existing .NET classes that have been written to work without prior knowledge of and/or experience with .NET programming. ConfigMgr, PowerShell really becomes so much more powerful when you look into classes that are available to you which haven’t been turned into Cmdlets yet!
For this post I’m going to give you a crash course in using .NET classes. Let me start by giving you a little bit of encouragement - if you know how to use PowerShell, you’ll have no problem using classes. I know things that sound like “programming” scare some of us, but honestly in using PowerShell you’ve got the basics down for it already… You CAN do this.
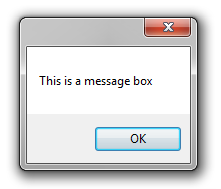
STARTING EASY Let’s start with something easy: Displaying a message box using Windows Forms. Here’s the command
[System.Windows.Forms.MessageBox]::Show("This is a message box")
Let’s deconstruct this string a little…
[System.Windows.Forms.MessageBox] is the way we reference the class we are calling. This is how all .NET classes can be referenced in PowerShell, and most good ISEs should be able to give you tab-complete hints as to what is available under each parent class. You can also reference the MSDN page for the classes to see what is available: [System.Windows.Forms.MessageBox] - generally a simple Google search for the class will direct you to this page.
“::” signifies that we are going to call a method or property from within that class to get the party started. In this case, the tab-complete menu shows that we have “Show” as an available method, so we call that.
In looking at the show method, we see that there are a lot of different available Overloads. Overloads basically just let the system determine what to do with the parameters you are passing to the method within the parenthesis. In our case, we are only passing one parameter - a string… so we can know that the overload labeled “Show(String)” is what we are using. If you look at that method you see that the string parameter is what is shown in the MessageBox. The result looks like this:
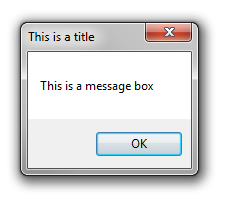
But what if we wanted a title? If we look through the available overloads, we find one that accepts two strings which “Displays a message box with specified text and caption.” The Show(String, String) method explains that the first string is the message and the second string is the title of the MessageBox window.
Let’s try it:
[System.Windows.Forms.MessageBox]::Show("This is a message box", "This is a title")
Now it’s going to get a little more challenging. What happens when the command you need to run will require more than just a simple line? If you’ve had your fill for the week, you might want to skip this section - ConfigMgr, if you’re interested in how we actually got the HTML data from the page, continue on.
CREATING A CLASS OBJECT VIA VARIABLE First we need to create the class object - in some cases a constructor exists allowing you to create a new object using the “New-Object” PowerShell command, sometimes a constructor doesn’t exist. In our case today we will look at an example where a constructor does NOT exist (or rather, doesn’t anymore). In a future post, we’ll talk about creating objects from constructors.
So, to start our request we’re going to make a request to the [System.Net.HttpWebRequest] .NET Class. We need to look at the available methods on that page and find one that suits our needs. ConfigMgr, in looking through the list I don’t see one that will connect to the website and I can’t create an object in PowerShell for this class without generating an error. Looking a bit further down the page I see a remark:
DOING STUFF WITH OUR CLASS OBJECT
Now that we have this variable with our class object… what do we do with it? Well, now we can reference any class properties or methods via the variable $wr.
So, let’s try setting a property. In this particular instance, the InterAction web server would only allow domain users to connect to the page, but the HttpWebRequest class isn’t passing my credentials by default. So maybe there is a property that passes the default credentials? By golly there is… so let’s set it to true… this is as simple as setting a variable in PowerShell.
$wr.UseDefaultCredentials = $true
Wow… that was easy… almost too easy. Now when the system actually connects to the server to do something (like what we’ll do in the next line), it will use the default credentials. Imagine what we’ve done so far is like getting ready to go to work. We’ll say that [System.Net.HttpWebRequest] is work, and before we leave for the day we need to know where we’re going (the “create” method) and we need to bring our badge with us (the UseDefaultCredentials property). So now that we’re at work, how do we get the HTML from the site? This gets a little more complicated - I’m sorry:
$sr = New-Object System.IO.StreamReader (($wr.GetResponse()).GetResponseStream())
Time to deconstruct this…
($wr.GetResponse()).GetResponseStream() - we’re going to call two methods in sequence here. The first part of this command “$wr.GetResponse()” makes the actual connection to the page and returns a response back to PowerShell. “.GetResponseStream()” takes that response and gets the HTML stream from the response. Going forward with the work analogy, lets say that “GetResponse” is like knocking on your boss’ door to get his attention, and “GetResponseStream” is like asking him for an envelope with some work in it. We can’t ask for the envelope without first getting the boss’ attention.
So now that we have the envelope, what do we do with it? The envelope itself isn’t really useful to us, we need something to open it and tell us what is inside. This is where System.IO.StreamReader is going to come into play. “New-Object System.IO.StreamReader” creates a stream reader and we’re passing it the stream. To further the analogy, we’re asking our assistant (the StreamReader object) to open the envelope for us and prepare to read it. We drop the whole object into a variable “$sr” like before so that we can issue it some commands on this specific envelop.
To get the HTML we just ask the assistant to read the contents of the envelope to the end and then put that data into a variable for us to read later:
$html = $sr.ReadToEnd()
Now we have a variable “$html” that contains the HTML output from the command. From here you’re free to do whatever you want to with the HTML - read it, parse it, dump it.
CONCLUSION
I hope we didn’t get too much in the weeds for you this week. I will continue to expand on using classes over the following weeks, and hopefully you’ll spend some time just playing with them yourself. As always, thanks for reading and happy admining!
Share this post
Twitter
Facebook
Reddit
LinkedIn
Email