


For those of you who are familiar with Azure Active Directory, probably none of what is in this post will surprise you or be of interest. I’m also not going to guarantee that what I write in here are “best” or even “recommended” practices. The goal behind these posts is to at least introduce those who have an interest in EM+S to some of the processes and procedures to get it set up and how to use it. Plus for me to share some funny photos along the way.
Today we’re going to talk about the four following topics:
- What is Azure AD?
- Users
- Groups
- Roles and administrators

What is Azure AD?
Your first inclination might be that Azure AD is a direct replacement for Active Directory Domain Services (or on-prem AD for the purpose of this post). It’s a good guess, but unfortunately it’s not correct.

Don’t feel bad though. It’s sort of confusing to call it Active Directory, if it’s not the “Active Directory” that you’re familiar with, and quite frankly they’re pretty darn similar. Azure AD is Microsoft’s answer to directory and identity management in the cloud, originally allowing access to cloud resources such as Azure and Office 365. As a matter of fact, if your company already has Azure resources or Office 365 subscriptions you have an Azure AD tenant to manage access to those products, even if you’re not synchronizing your on-prem AD accounts to Azure AD.
However, Azure AD offers features that wouldn’t traditionally be offered by a standalone on-prem AD environment (without third-party tools). Features like single sign-on to cloud applications, dynamic groups, risk-based conditional access, and more.
With that said, let’s get into the very basics of Azure AD.
Users
Users should be a pretty familiar concept to anyone who has made a living in administration of on-prem AD. Users in Azure Active Directory are very similar to on-premise Active Directory users in the sense that they have identities with properties such as name, username, job title, department, contact info, etc. They can also belong to Azure Active Directory groups. They’re so similar in fact that you can synchronize your on-premise AD with Azure AD (more about that in a future post).
When you created your trial account, you were asked to create the first user account in your Azure AD tenant. Let’s take a look at that account now. Open a web browser to the Azure Portal and sign in with those credentials. On the left side of your browser window you should have a list of all the Azure services available to you, look for the one labeled “Azure Active Directory” and click on it. This will bring you to the overview page for your Azure AD tenant with it’s own associated menu. In that menu, under “Manage” find the “Users” link and click on it. If this is a fresh Azure AD installation, you should only see one Azure AD user - the user account you created when you setup your EM+S 90-day trial. Click on the name of your user account and we’ll get started with the fun.
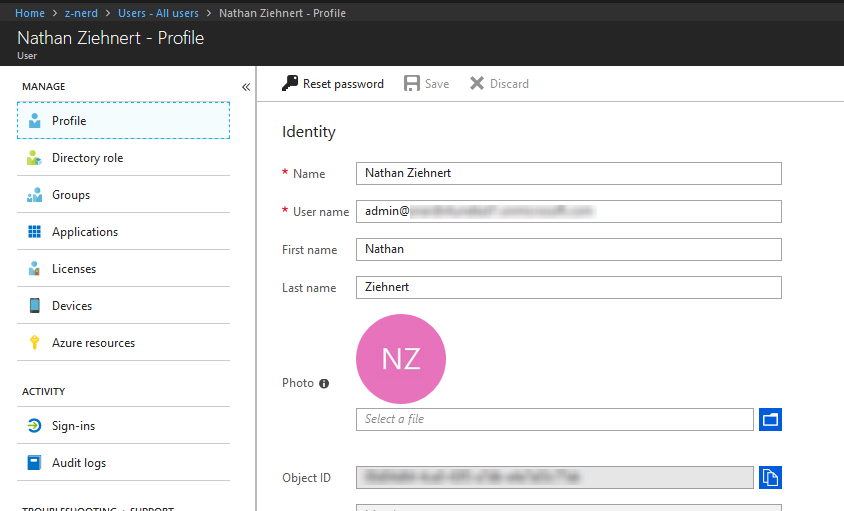
You should see a list of properties on the right hand side, and a list of management and activity options on the left hand side. For now take a look over the properties and get acquainted with them. For now, let’s leave this user alone and go back to create a new user. At the top of the menu click “Users - All Users”

Creating a New User
From the “Users - All users” page, you should see two links in relation to creating user account - “New user” and “New guest user”. Normal user accounts would typically be created for users on your company’s payroll, and guest users would be external contractors or other “guests” to your network. By default guest users have a very limited scope of access in Azure AD:
- Guest users typically cannot be assigned any administrative roles in the directory.
- They cannot enumerate users/groups/directory resources.
- They CAN invite other guests to collaborate on resources secured by Azure AD.
With that little bit of info out of the way, let’s click on the “New user” button and create a new users.
NOTE: In many organizations you’ll be synchronizing your current on-prem AD with Azure AD so there wouldn’t necessarily be a need to create Users. However it’s a good thing to learn anyways.
Click on the “New user” button and you’ll be prompted to give the user account a name and a username. Put whatever you want in the Name field. Note that for now you will have to use your “onmicrosoft.com” domain for the username because we have not verified any other domain. We’ll learn about that in a later post. Pressing the “Profile” menu will let you give some more details, like First name, Last name, Job title, and Department.
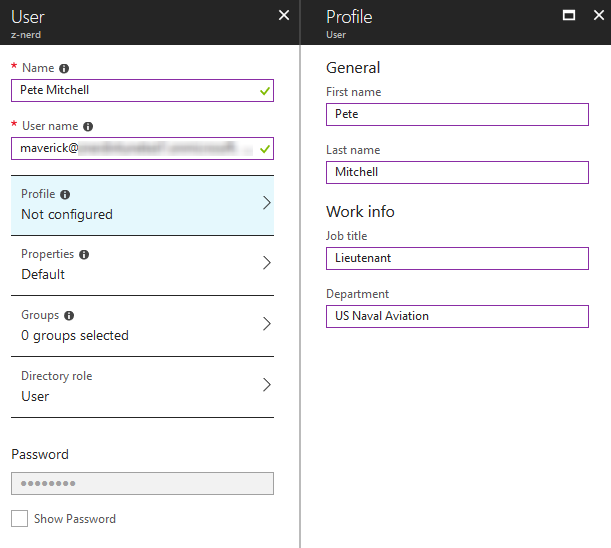
Once you’re satisfied with the profile information, press “Ok” to save it. The “Properties” menu will not have anything under it currently other than a disabled box for “Source of authority”. Since we’re not synchronizing on-prem AD this feature is not enabled. For now we’ll leave the Groups alone. Under “Directory role” you have three options:
- User
- Global Administrator
- Limited Administrator
Users have limited rights in Azure AD, similar to what you might find in an on-prem AD environment. Global Administrators have access to… you guessed it… everything. Limited Administrators are given a subset of roles, similar to the default security groups in an on-prem AD environment. You can learn more about these roles here but for now we’ll just keep the default “User” role.
Your user will be assigned a temporary password for the time being, you can view
the password by ticking the “Show Password” checkbox. After you make note of the
password, you can press the “Create” button! Congratulations - you’ve created your
first second Azure AD account!
Editing a User Account
Editing a user account will give you access to more properties than were available when we created the account. Editing the account just requires that you click on the username of the account you wish to edit. We can now do things like add a photo for the user, add contact info, and more. One important fields to consider will be “Authentication contact info” which will be used for Azure MFA (Multi-factor authentication) later in this blog series.
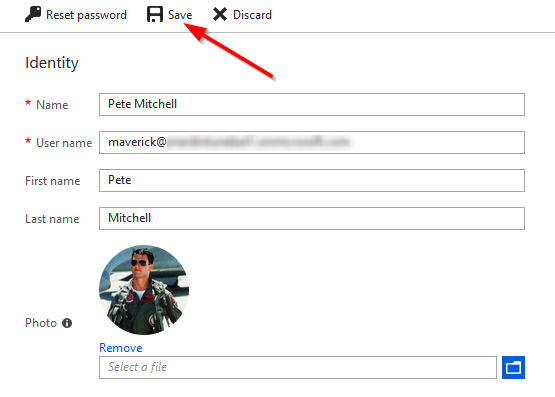
Once you’re satisfied with the changes, press “Save”. The “Save” and “Discard” buttons should become disabled until you make your next change. If you’re satisfied with the profile, you can now click back to the “Users - All users” menu or select another option from the user management menu.
Deleting a User Account
This one is really simple. From the “Users - All users” menu in your Azure AD portal tick the checkbox in front of the user you want to delete and press “Delete User” from the menu.
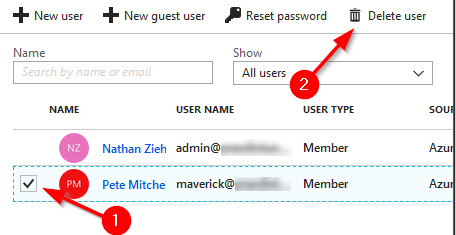
You’ll get a confirmation prompt, and once you accept it, the user will be removed from Azure AD.
That’s all for now on users. There is a lot more to cover, but they will be applicable to other features in the EM+S suite, so we’ll wait until then to cover them.
Groups
Groups should also be a pretty familiar concept to you. The thing about Azure AD groups though, is that without any special add-ons you can create Dynamic Groups! So you can base the membership of a group on AD attributes for the user or device account. Anyways let’s talk about creating groups, adding/removing members, and deleting groups.
Creating a New Group
From the main Azure AD Portal, press “Groups”. In a similar fashion to creating a new user account, press “New group”. You have two different types of group you can create: Security, and Office 365. In almost all cases you’ll be using Security groups unless you want to create a group specific to Office 365 applications.
Give you group a name, give your group a description if you want, and finally give it a membership type. You have the option between:
- Assigned: You manually add/remove devices/users from the group.
- Dynamic User: You write a query which will build your group membership of users.
- Dynamic Device: Same as Dynamic User except for Devices instead.
For now let’s select “Assigned” and click on the “Members” option that pops up. Choose the members you want to add to the group then press “Select”. If you make a mistake, you can remove the user from the group before pressing “Select”.
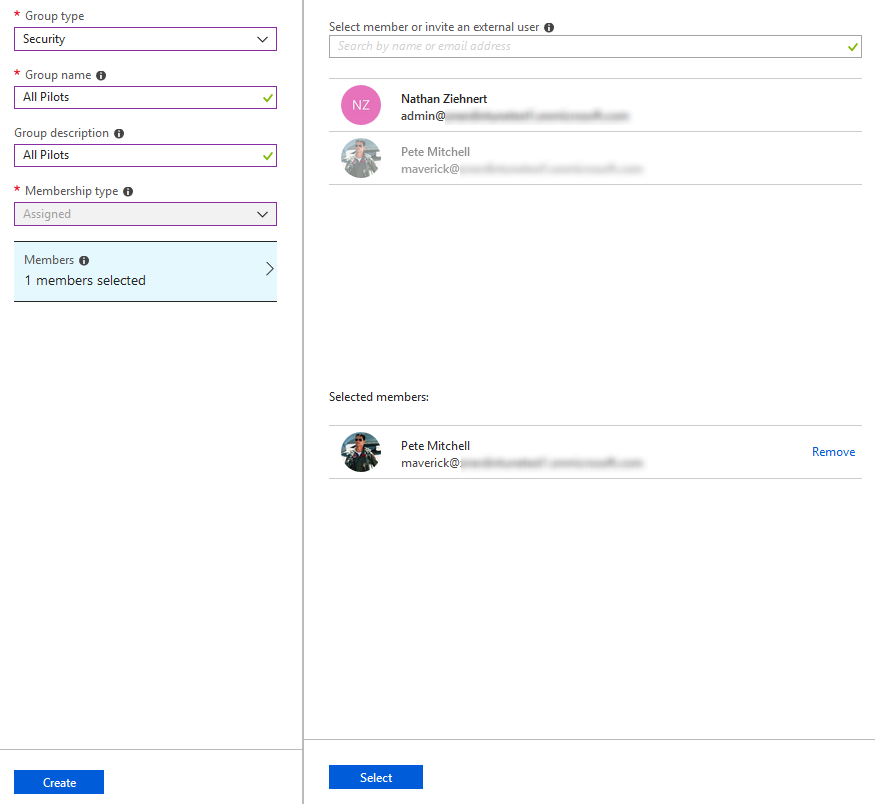
Once you’re satisfied with the group, press the “Create” button and your group will be created!
Editing a Group
From the “Groups - All groups” page, similarly to editing a user, you will just press on the name of the group. From this menu you have the ability to:
- Manage members by pressing the “Members” menu option
- Manage what groups this group belongs to by pressing the “Group memberships” menu option
- Many more options that we’ll cover in future posts.
For now lets just add another member to the group. Click on the “Members” link and press “Add members”. Locate the group or user you wish to add to the group, click on that user, and then press “Select” to add them to the group.
To remove a user from the group, click on the name of the user and then press the “Remove” button. You will be asked to confirm the removal.
There are quite a few more options for groups, but those are the basics for the time being. We will cover some of the other features in future posts.
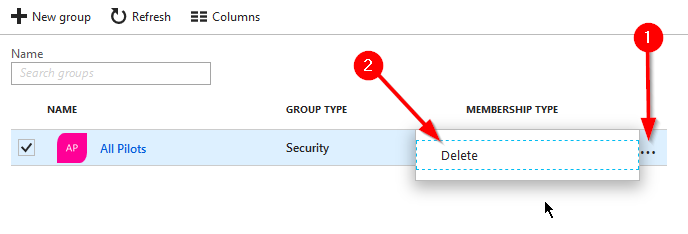
Deleting a Group
From the “Groups - All groups” menu locate the group that you want to delete, and press the “…” button on the far right. From there press “Delete” and you will be prompted whether or not to delete the group. If you select “Yes” then the group will be removed as well as all of the group membership.
If the group is an Office 365 group and there was data associated with that group in an Office 365 App, that data will also be removed.
That’s all on groups - we’ll cover more in future posts as we encounter them again!
Roles and Administrators
Finally in this post we’ll cover Roles and Administrators. On your user accounts you can assign administrator privileges to the Azure tenant. Remember that users can be “Users”, “Global Administrators”, and “Limited Administrators”. When you are a Global Administrator you have access to all of the data available in the Azure AD tenant (this extends BEYOND groups/users and into things like Intune). In most cases for administrators, you will want to limit the scope of what they can do within the Azure AD tenant.
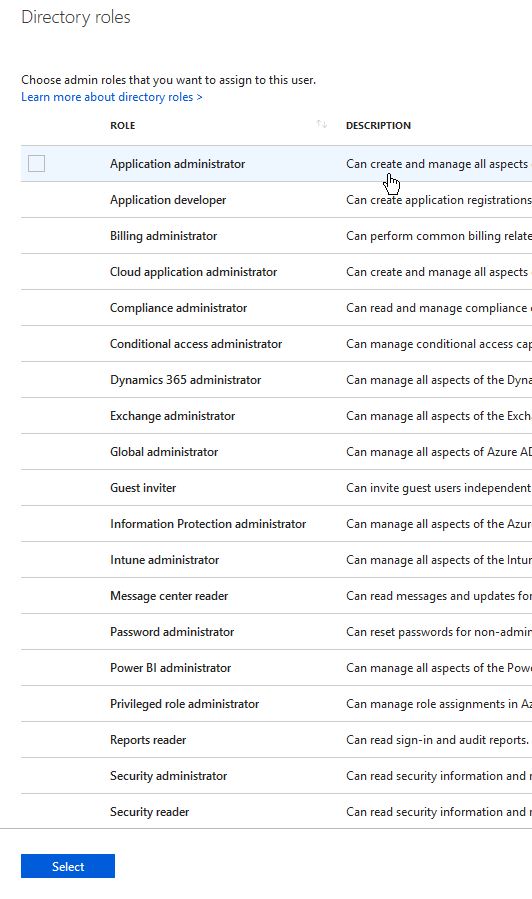
To give a user an administrative role, you will go back to the user portal, click on the user that we want to add the role to, click “Directory role”, and then click “Add role”.
There is a large list of roles available with excellent descriptions of what each role gives access to. You can access that link here: https://docs.microsoft.com/en-us/azure/active-directory/users-groups-roles/directory-assign-admin-roles.
Let’s select “Global Administrator” for funsies and then press the “Select” button.
Now to remove the role, we just need to check the box in front of the role, and then press “Remove role”

That’s it for Roles and Administrators - pretty simple stuff really!
Final Thoughts
So we’ve reached that time in a blog post where it starts to run too long. Like I said in my previous post “poke around” - this is a demo account so if you break it, no harm no foul. In the next post we’ll dive into connecting a domain to our test account so that our users can be “[email protected]” instead of “[email protected]”.
Until next time, Happy Admining!
Share this post
Twitter
Facebook
Reddit
LinkedIn
Email