


I hate taking these hiatuses, but this one has been for good cause! I’ve been working on a few different projects (in and out of work), but this one I’ve been dying to share with you all. The PeerCache Explorer!
Ever since PeerCache has become more popular with my clients, the more times I’ve run into them having issues with it. Not because of anything wrong with PeerCaching itself, but because of bad packaging practices carried over from legacy packagers. More specifically, writing files to the ccmcache folder during the installation of a package or application.
Don’t do it. Just. Don’t.
I definitely can see changing the content of the cache folder when running packaging tests - because the ConfigMgr client doesn’t re-validate the hash of the content that is already “downloaded”. However, for any other purpose, you shouldn’t write any content to the ccmcache folder - especially for PeerCache Super Peers.
Why, you ask? Here’s a quick flow on how the content delivery and validation works for Super Peers when they share content with requesting peers:
- SuperPeer requests content download for a package
- SuperPeer downloads content from distribution point
- SuperPeer validates the hash of the content against the hash stored in the CM database.
- SuperPeer reports that the content is now available to be shared.
- SuperPeer executes the installation.
- Requesting peer requests content download for the same package.
- Management Point instructs requesting peer to get it from the SuperPeer.
- SuperPeer gives the requesting peer ALL of the content in the cached folder (including any changes).
- Requesting peer validates the hash of the content against the hash stored in the CM database.
So if you introduce new content into the ccmcache folder for that particular package, you can see why this could be problematic for content sharing when the requesting peer re-validates the content hash.
Okay *steps off soapbox*. I also like to visualize things - and to the best of my knowledge, outside of custom rolling an SSRS report there isn’t a way to visualize the content that SuperPeers are sharing. The utility also gives you the benefit of being able to remove content from a SuperPeer if there are issues with it. In a future revision I’d like to add content validation, but at this point it’s unclear how the content hash is generated by ConfigMgr. Maybe I’ll corner the ConfigMgr team at MMS Jazz Edition.
“Installing” PeerCache Explorer
Before I give you the link… here’s the standard legalese…
THE SOFTWARE IS PROVIDED "AS IS", WITHOUT WARRANTY OF ANY KIND, EXPRESS OR
IMPLIED, INCLUDING BUT NOT LIMITED TO THE WARRANTIES OF MERCHANTABILITY,
FITNESS FOR A PARTICULAR PURPOSE AND NONINFRINGEMENT. IN NO EVENT SHALL THE
AUTHORS OR COPYRIGHT HOLDERS BE LIABLE FOR ANY CLAIM, DAMAGES OR OTHER
LIABILITY, WHETHER IN AN ACTION OF CONTRACT, TORT OR OTHERWISE, ARISING FROM,
OUT OF OR IN CONNECTION WITH THE SOFTWARE OR THE USE OR OTHER DEALINGS IN THE
SOFTWARE.
It’s a standard PowerShell script using PoSH Presentation Framework. Just download all the contents in the GitHub repository to a folder. You can get the contents from here: https://github.com/theznerd/PeerCacheExplorer/
Prerequisites
There are two prerequisites to using the PeerCache Explorer. Since the database is the only place that the SuperPeers are defined and accessible you need to run the script with an account that has read permissions to the database (or use alternate credentials - more on that later). Additionally, if you would like to remove content from the SuperPeer, the account running the script needs to have administrative privileges to the SuperPeer.
If you need to give an account or group read permissions to the CM database you can do so with the following SQL script:
DECLARE @Group varchar(100)
DECLARE @cmd varchar(250)

/* SET YOUR GROUP OR USERNAME AND DATABASE HERE */
SET @Group = N'domain\grouporuser'
USE CM_XXX

IF NOT EXISTS(SELECT principal_id FROM sys.server_principals WHERE name = @Group) BEGIN
	SET @cmd = N'CREATE LOGIN [' + @Group + '] FROM WINDOWS'
	EXEC (@cmd);
END

IF NOT EXISTS(SELECT principal_id FROM sys.database_principals WHERE name = @Group) BEGIN
	SET @cmd = N'CREATE USER [' + @Group + '] FOR LOGIN [' + @Group + ']'
	EXEC (@cmd);
END

SET @cmd = N'EXEC sp_addrolemember ''db_datareader'', [' + @Group + ']'
EXEC (@cmd);
Setting Up
On your first run of the application (or if you wish to change the settings) press the “settings” button in the title bar and then fill in the database server FQDN and CM Site Code. Additionally, if you need to use a different account to access the database, you can define it by checking the “Use Alternate Credentials” checkbox and pressing the “Set Credentials…” button.
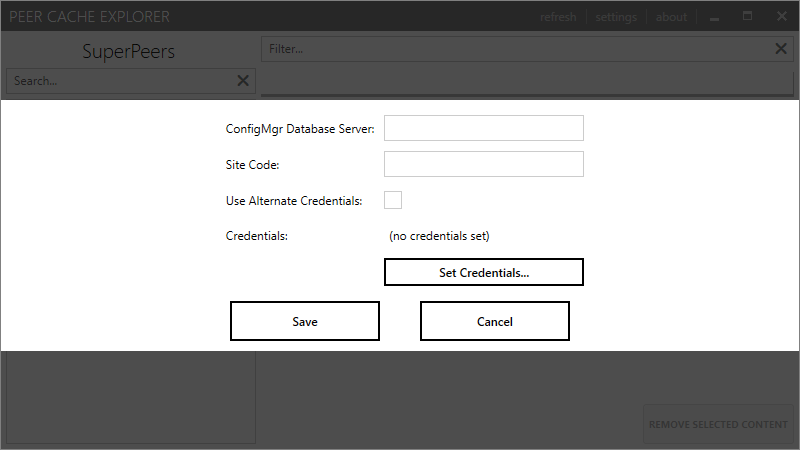
Press “Save” and then press the “refresh” button to gather the contents. On future launches if the settings have already been saved, the refresh will take place upon launch.
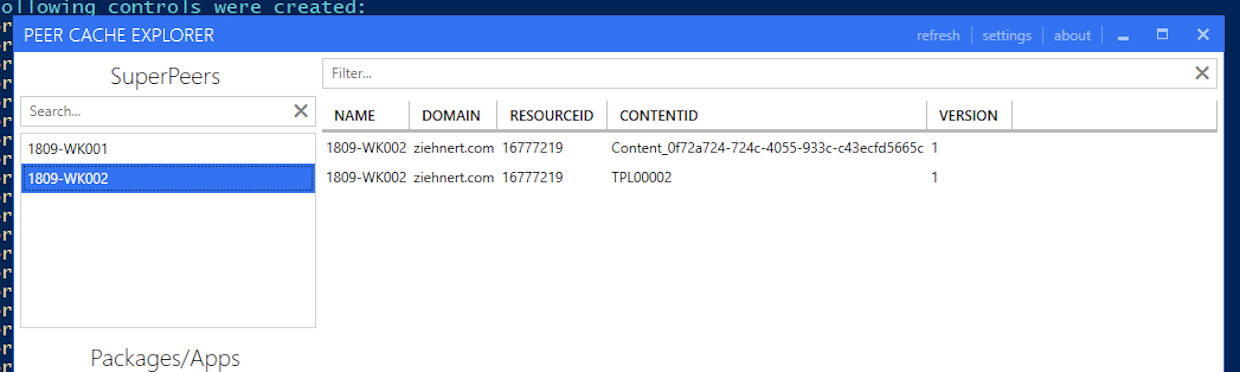
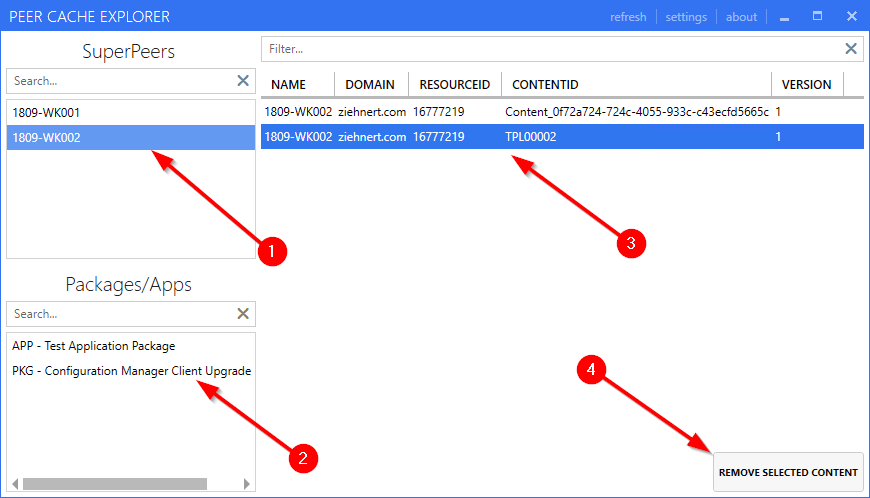
Using PeerCache Explorer
Once the database query is completed, you can do the following:
- Select a SuperPeer to find out what content is being shared by that device (see screenshot item 3)
- Select a package or application to find out which SuperPeers have that content (see screenshot item 3)
- Review the devices or packages selected
- Remove selected content from SuperPeers
The content removal is done over WMI, so there is no need for Remote PowerShell to be enabled. Provided you have administrative privileges to the SuperPeer this should work.
And that’s it! Let me know what you think in the comments below, and if you have any issues, raise an issue on my GitHub repository!
Thanks for reading, and as always, Happy Admining!!
Share this post
Twitter
Facebook
Reddit
LinkedIn
Email