


In the second part of this series, we walked through the initial considerations, installation, and configuration of the AGPM Server and the AGPM Client (which if I didn’t make it clear before - the client is ONLY required on the machines that will be managing controlled group policies) - in this post we’ll actually put all of that work to “good” use and create some policies. We’re going to do this two separate ways:
the hard way (following the full approval process)

and the easy way (when you’re the judge, jury, and executioner of your GPOs)

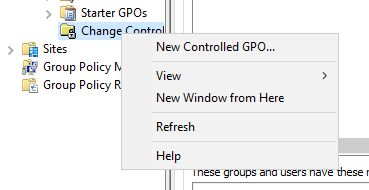
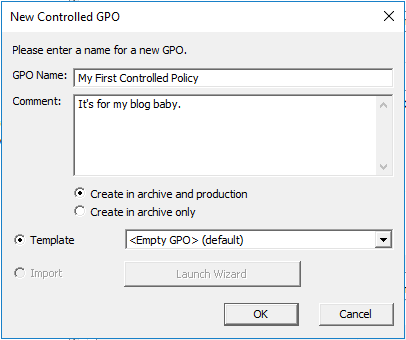
Editor User (Step 1) Open up group policy management as a user belonging only to the “Editor” security group, and then open change control. Right-Click on “Change Control” and select “New Controlled GPO…”
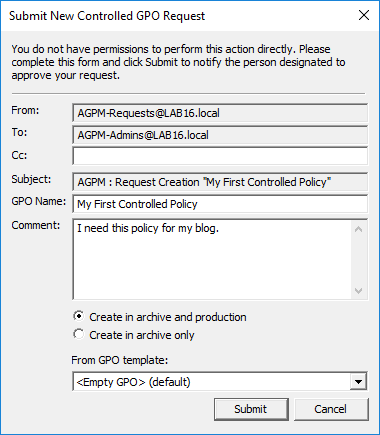
Now - because you’re an editor you’ll actually receive a “Submit New Controlled GPO Request” - choose a name for your GPO, give a comment you want to send via the e-mail, select a GPO template (if appropriate), and finally select either “Create in archive and production” or “Create in archive only”. That last choice has to do with whether or not you want to create the GPO in your domain (Production) in addition to AGPM (Archive) - generally in our environment we create both, but that decision is up to you - it’s not going to hurt anything to create it in production since it won’t be linked anywhere.
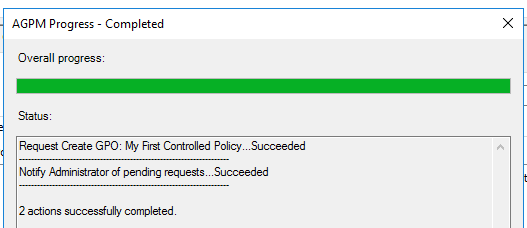
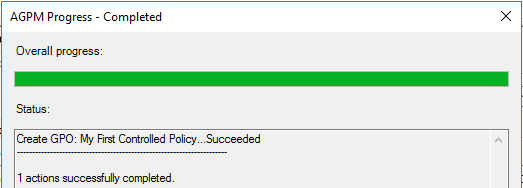
Once you submit the request, you’ll see an email go through your SMTP server (or show up in the PaperCut console), and you’ll get this nice status window:
Once clicking close - if you click on the “Pending” tab, you’ll see the request sitting in queue.

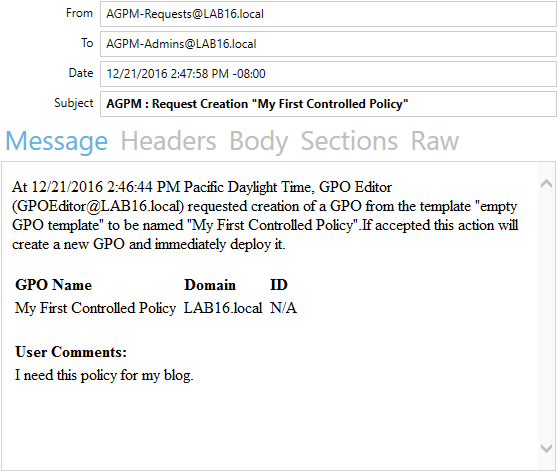
The email will look something like this:
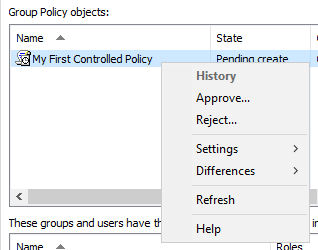
Approver User (Step 2) Open up group policy management as a user belonging only to the “Approver” security group, and then open change control. Go to that “Pending” tab - right-click on the new policy, and then select “Approve…” - enter whatever comment you want in here - it will be kept in the history of the GPO.
Once you enter a comment and press OK, you’ll get another AGPM progress window:
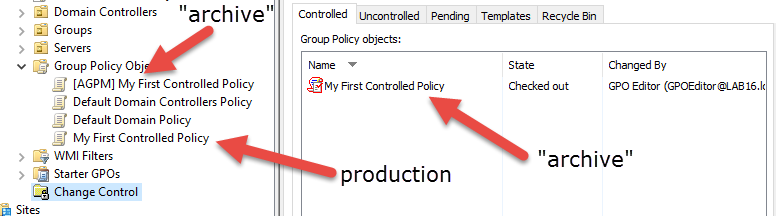
Now that the policy creation has been approved, the policy will be created in the domain (provided you selected the Production option) and in the Archive. You can see this by clicking on the “Contolled” tab and also by expanding “Group Policy Objects”

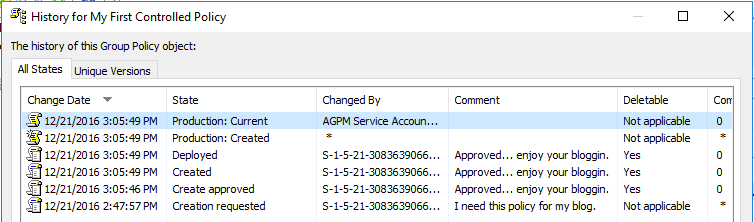
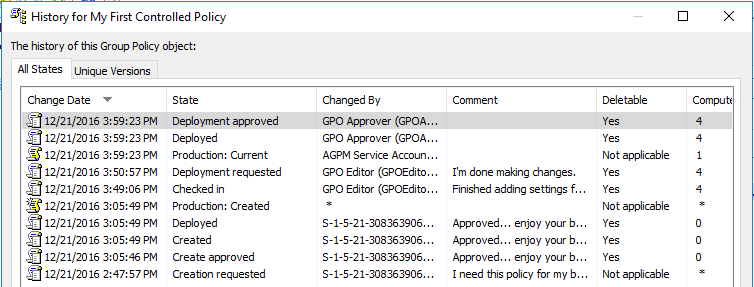
The distinction here is important - production is actually pushed to the Domain (SysVol), while Archive is stored in your archive folder on the AGPM server. Editing the GPO in Production will not reflect changes back to AGPM (unless you re-import the policies - which we’ll talk about in a later post), and editing the policy in AGPM will ONLY reflect changes back to Production if they are deployed (which we’ll do later after the “Editor” makes their changes). If you right click on the policy (in Change Control) and select “History” you’ll get a nice history of everything that has happened thus far (notice where the policy is created in Archive as well as Production):
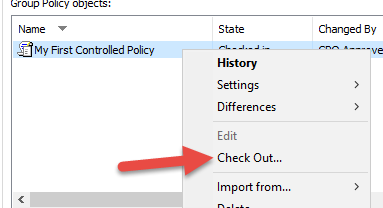
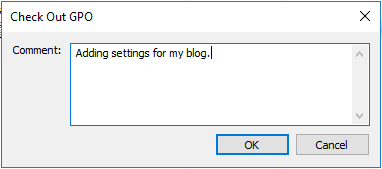
Editor User (Step 3) Open up group policy management as a user belonging only to the “Editor” security group - select the “Controlled” tab, right-click on the new policy and select “Check-Out…” - you may also add a reason for the check out in the policy - this will be reflected in the history.
I want to point out something now that we’ve checked out our policy for editing. If you expand “Group Policy Objects” now you will see the creation of a new GPO. It has the same name as the policy you just checked out but it also has “[AGPM]” prepended. Any changes you make in AGPM to the policy are automatically reflected to this [AGPM] policy - which is useful if you want to test your policy before “going to production” - you can link this [AGPM] policy to any OU just like you would a normal GPO because, in fact, it is a normal GPO.
Okay - now that I’ve pointed that out, right-click on the policy in Change Control and select Edit. You can also edit the policy directly from Group Policy Objects (you should have the appropriate permissions to do so as assigned by AGPM since you checked it out). Now at this point go ahead and make your changes to group policies. Once you’ve made the appropriate changes, you can close the editor window. It is necessary to set any appropriate filtering (security or WMI) and GPO Status (disable user or computer policies if there are none to speed up group policy processing time) from the “Group Policy Object” folder directly as there is no way to manage this directly in AGPM. It’s a minor oversight since most of the time filtering isn’t really used. It would be worthwhile to perform your testing now, if you have a documented test procedure because once you check the policy back in the [AGPM] version disappears from the domain. Once your testing is complete, right-click on the policy in AGPM and choose “Check in…”. Add the appropriate comment and then click OK.
Now as the Editor, you are unable to deploy a policy to production (which copies the policy from the AGPM Archive into the existing [or potentially new] production GPO) - we’ll have to submit another request. Right-click on the policy and select “Deploy…” and submit a deploy request in the same way we submitted a new policy request.
Approver User (Step 4) Make note of the language used in the new request e-mail. It is very similar to the language when a new policy was requested - it explains EXACTLY what will happen when you approve the request. Approving the request immediately performs the action, it doesn’t give permission to the editor to perform the request.
It’s just something to be aware of. At this point it might be wise to review the changes - open Change Control, right click on the policy, select “Differences” and then “HTML Report”. This will pop a new window with the changes that you are approving to this policy. Once you’ve reviewed the changes, you can right click on the policy and select “Approve…” or “Reject…” (you hold the keys). If we take a look at the history again we’ll see everything that has happened according to AGPM
Well that’s it! All that is left to do is link the policy to whatever OUs your little heart desires

(with the proper approvals of course).
Now you’ll see this policy hanging out in the “Controlled” tab. Right-click on the new policy and select “Check-Out…” - you may also add a reason for the check out in the policy - this will be reflected in the history.
I want to point out something now that we’ve checked out our policy for editing. If you expand “Group Policy Objects” now you will see the creation of a new GPO. It has the same name as the policy you just checked out but it also has “[AGPM]” prepended. Any changes you make in AGPM to the policy are automatically reflected to this [AGPM] policy - which is useful if you want to test your policy before “going to production” - you can link this [AGPM] policy to any OU just like you would a normal GPO because, in fact, it is a normal GPO.
Okay - now that I’ve pointed that out, right-click on the policy in Change Control and select Edit. You can also edit the policy directly from Group Policy Objects (you should have the appropriate permissions to do so as assigned by AGPM since you checked it out). Now at this point go ahead and make your changes to group policies. Once you’ve made the appropriate changes, you can close the editor window. It is necessary to set any appropriate filtering (security or WMI) and GPO Status (disable user or computer policies if there are none to speed up group policy processing time) from the “Group Policy Object” folder directly as there is no way to manage this directly in AGPM. It’s a minor oversight since most of the time filtering isn’t really used. It would be worthwhile to perform your testing now, if you have a documented test procedure because once you check the policy back in the [AGPM] version disappears from the domain. Once your testing is complete, right-click on the policy in AGPM and choose “Check in…”. Add the appropriate comment and then click OK.
Finally we right click on the policy and select “Deploy…” - you’ll get a message asking you to confirm, and then once you do confirm it will automatically deploy the “Archive” policy to “Production”. Now all that is left to do is link the policy to whatever OUs you want to link it to!
Share this post
Twitter
Facebook
Reddit
LinkedIn
Email